How to do a Thumbnail Sketch Step-by-Step! The Artist's Secret Weapon
Would you like to simplify your painting process, avoid wasting time, and avoid a lot of frustration when things aren't going the way that you want? Then please. . . PLEASE don't use the advice I'm about to give you!
If you've been around me at all you know that I love to jokingly use reverse psychology because my mom used to do it to me all the time. But anyway, let's get into the wonders of the thumbnail sketch!
The Magical Thumbnail Sketch
If you want to:
- Grow in your art
- Improve your paintings
- Save yourself time and energy
- Avoid trying to fix mistakes that could have been avoided
Then the thumbnail sketch is for you! Which covers pretty much all of us I think. It acts like a roadmap for your painting. Except it's even better than a map because in this wonderful world of painting you can go anywhere you want. You can change the SEASON, the WEATHER, the LIGHTING - everything about your scene before you start painting it! The thumbnail sketch lets you take control of your painting.
How to do a Thumbnail Sketch
The point of the thumbnail sketch is twofold. 1) To simplify your reference photo into big shapes and 2) to experiment with your design and find a design that works for you. To do a thumbnail sketch, here's what you're going to need:
- A 4B or 6B pencil
- A sketchbook
- A printed photo or a reference photo on your phone / PC
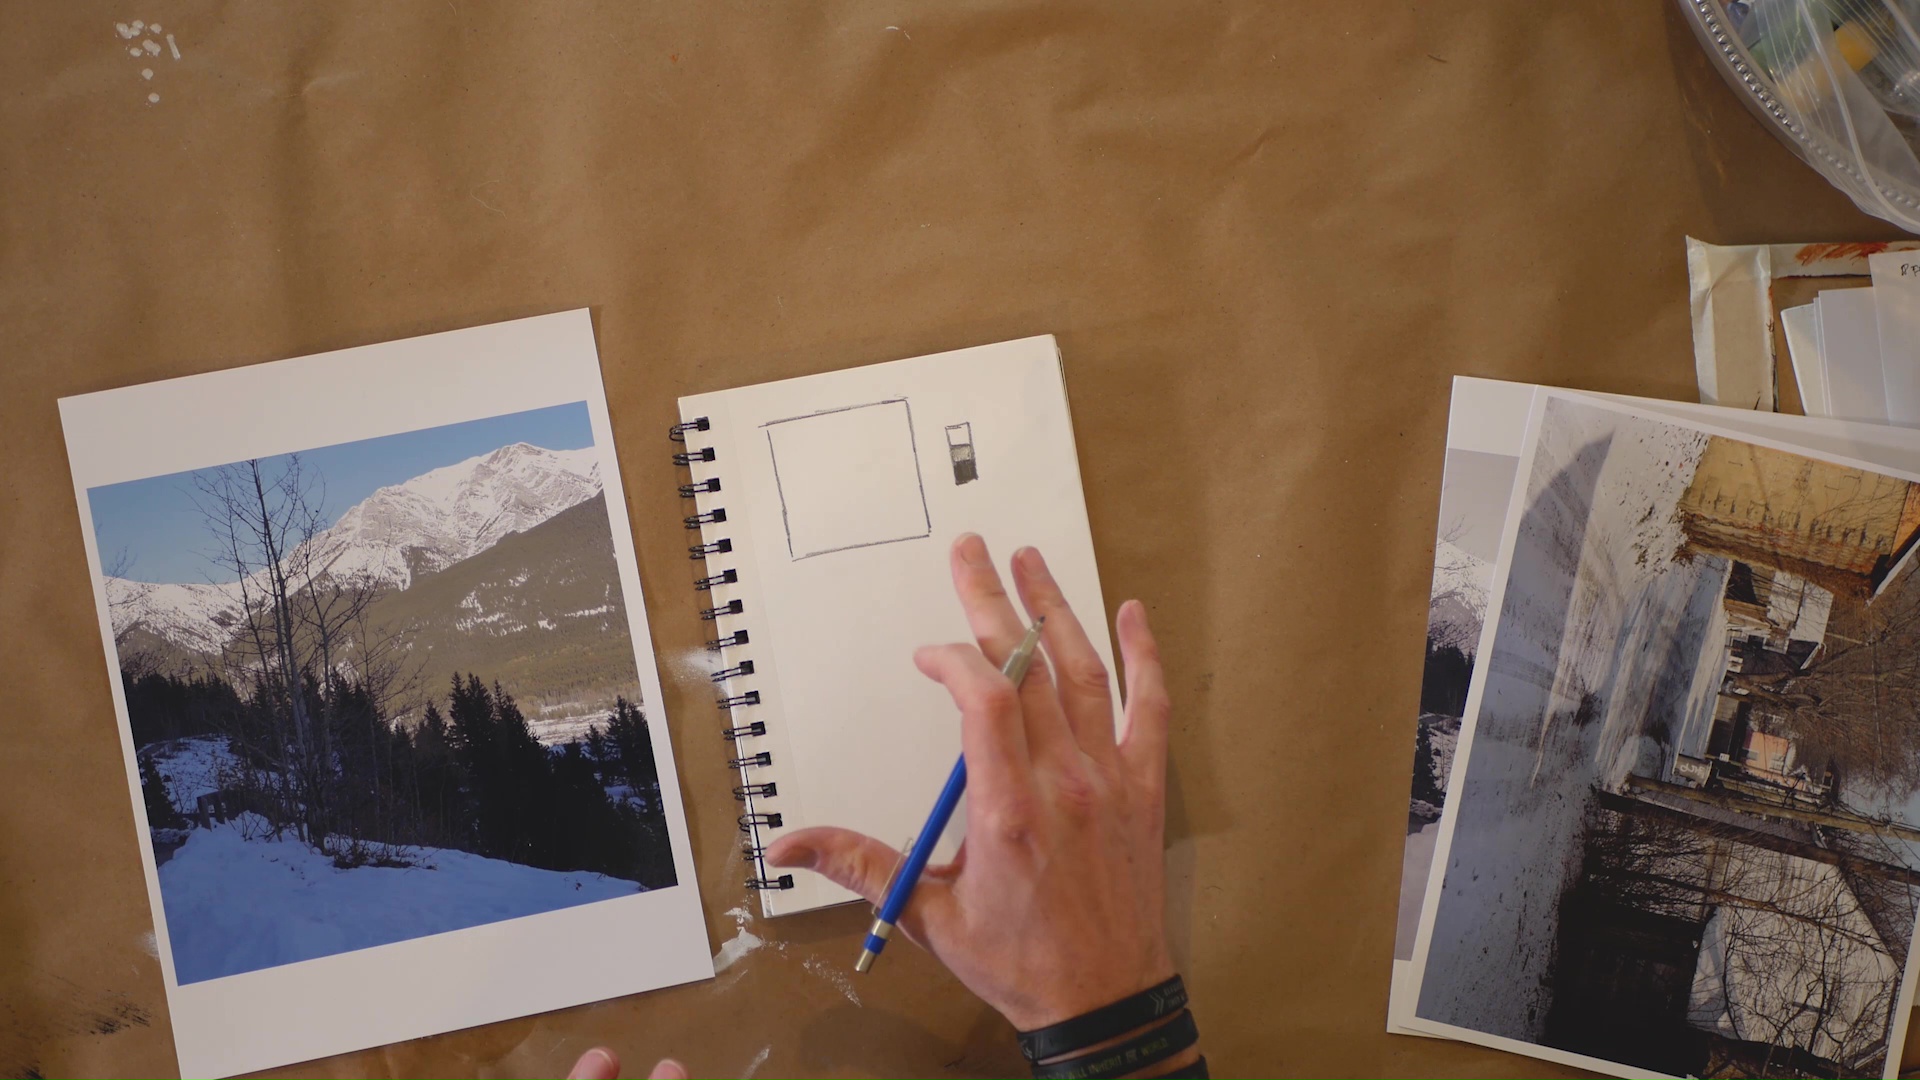
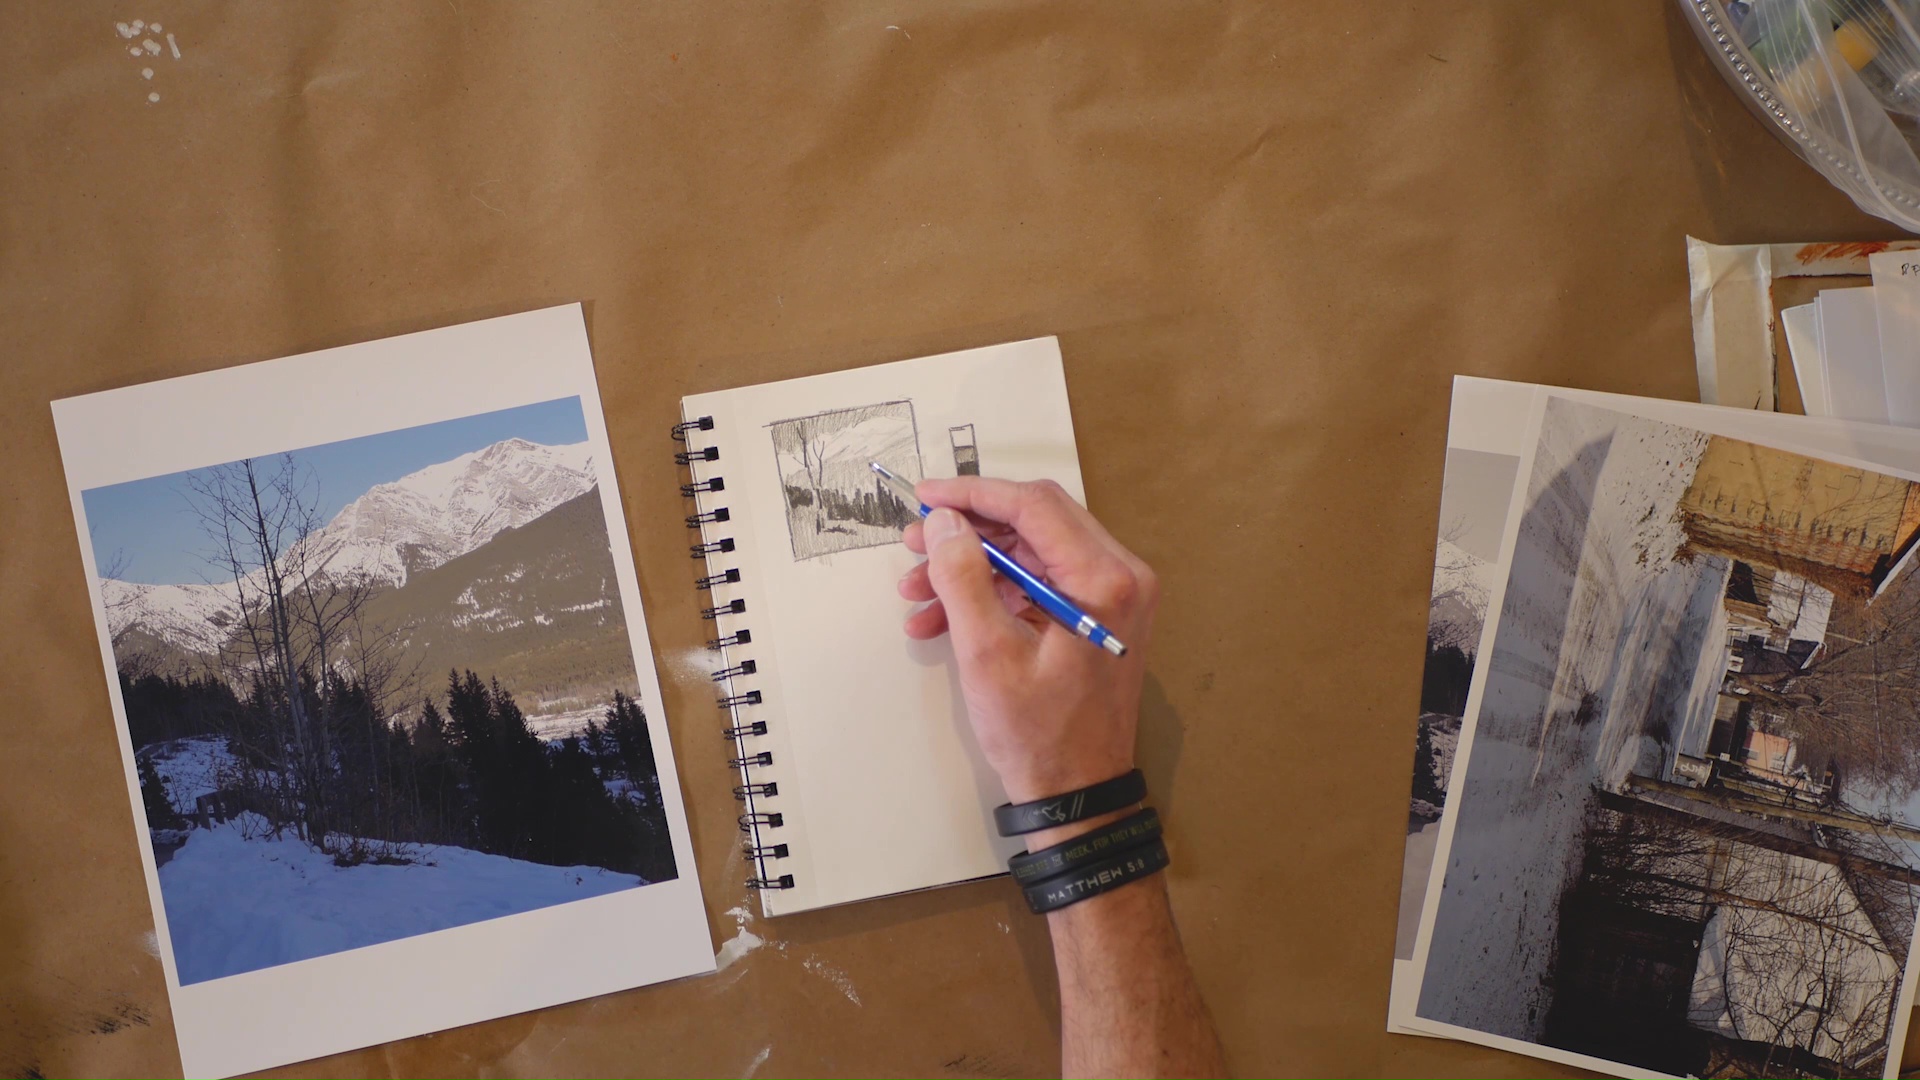
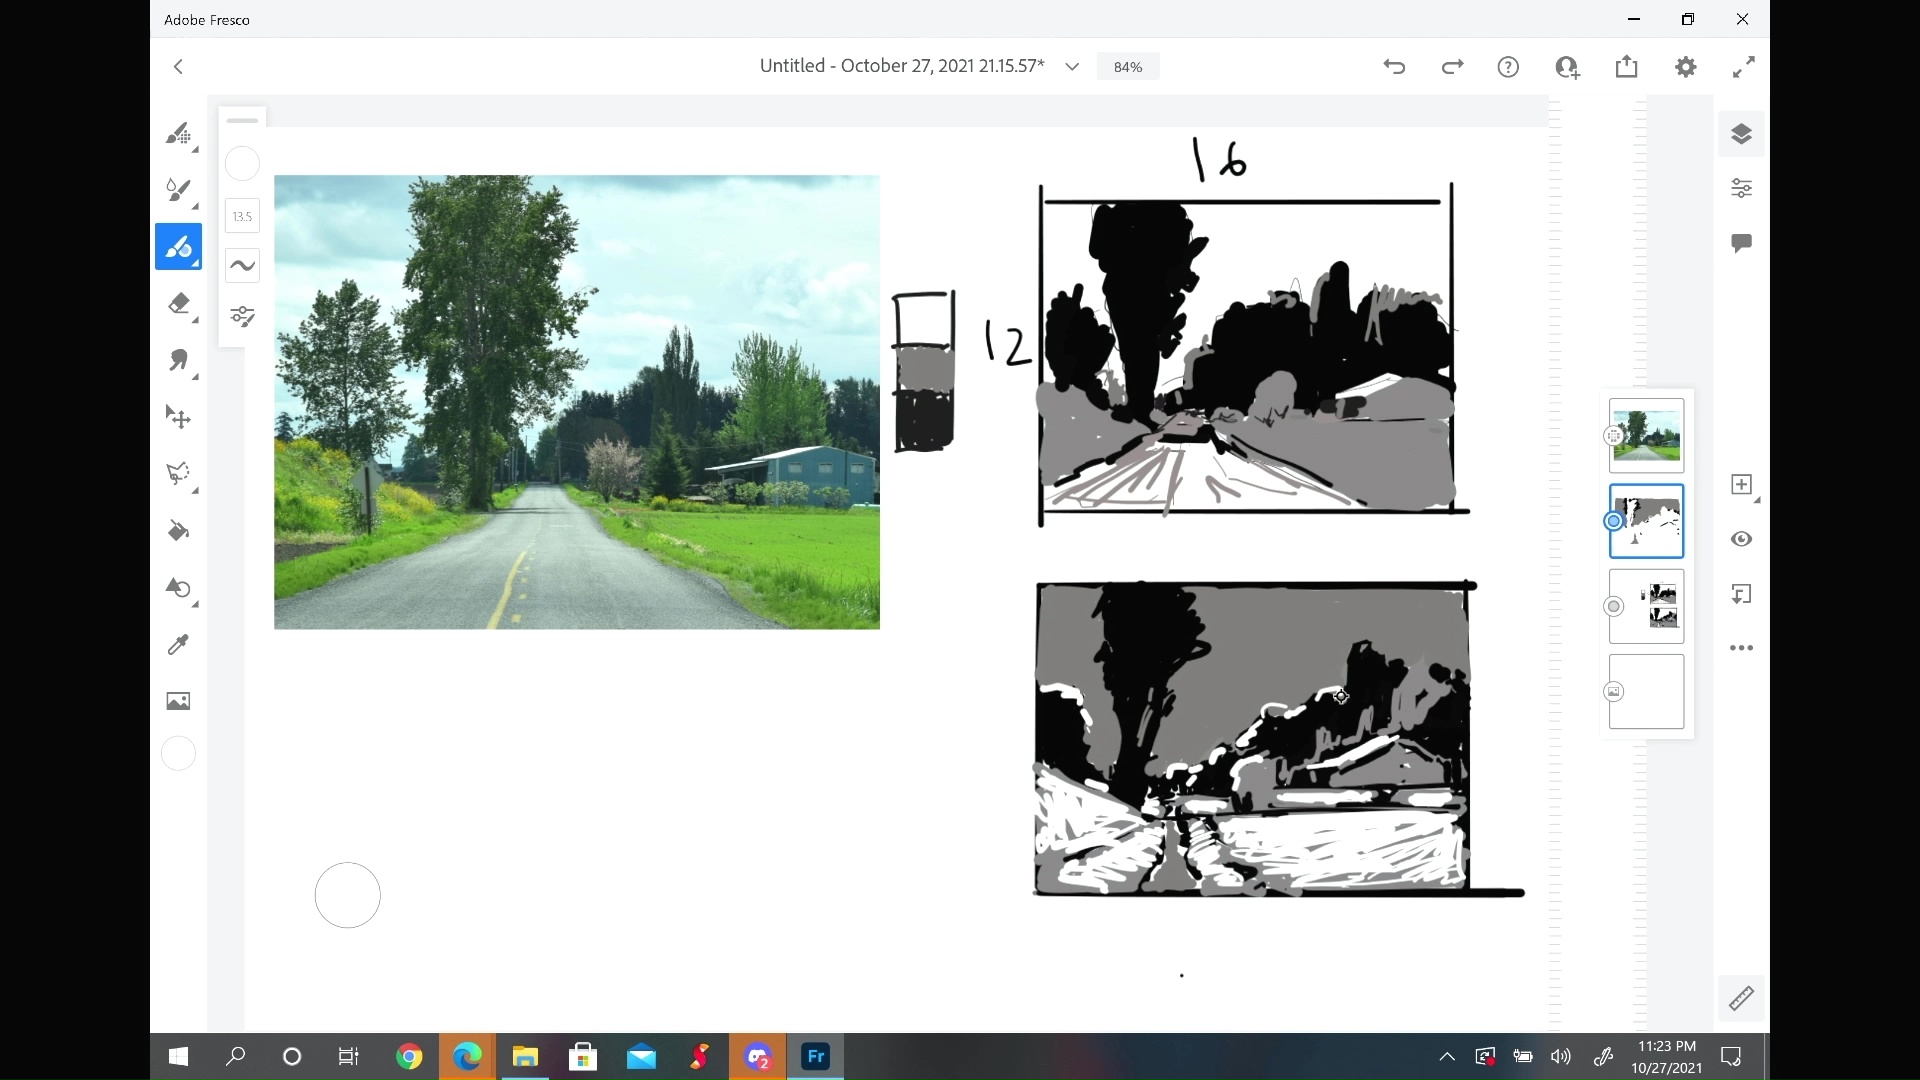
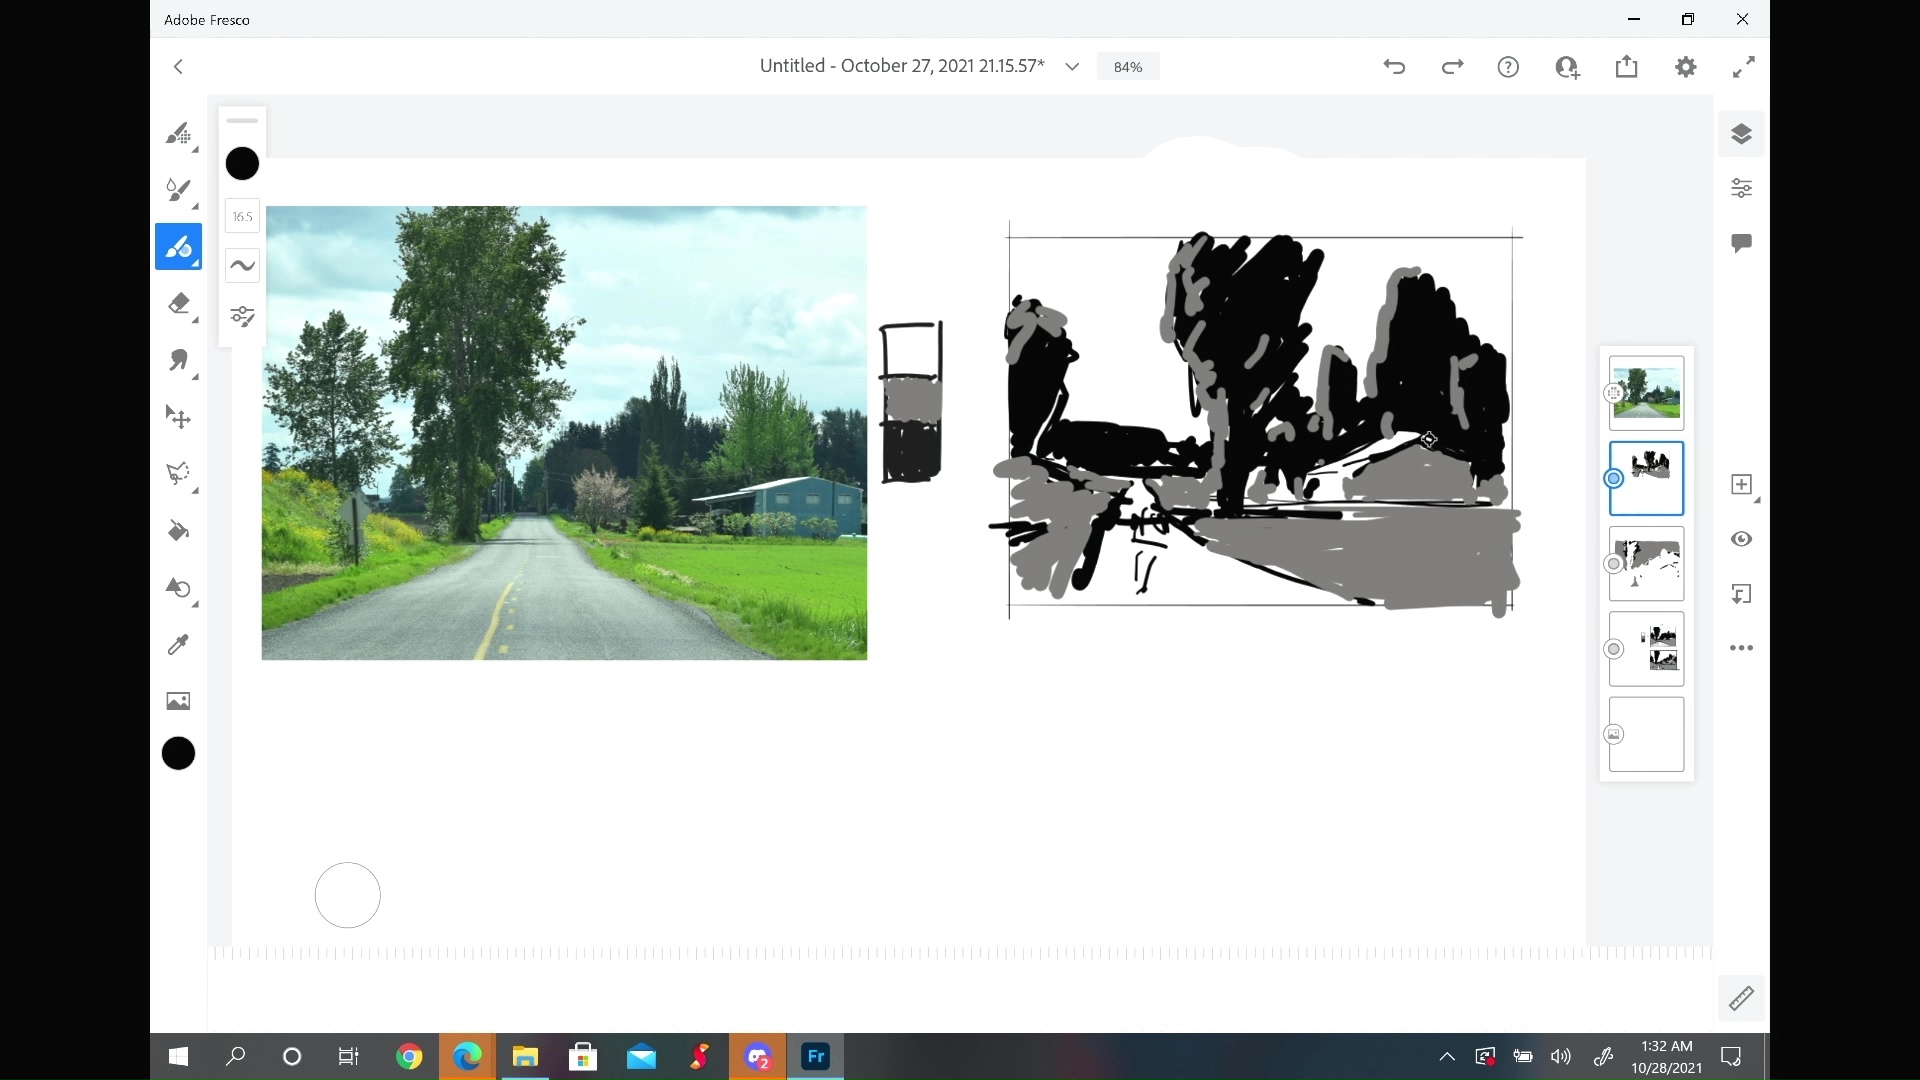
Step 1: Draw a box on your sketchbook. Make sure the size of the box is proportionate to the size of your reference photo. Here's an example:
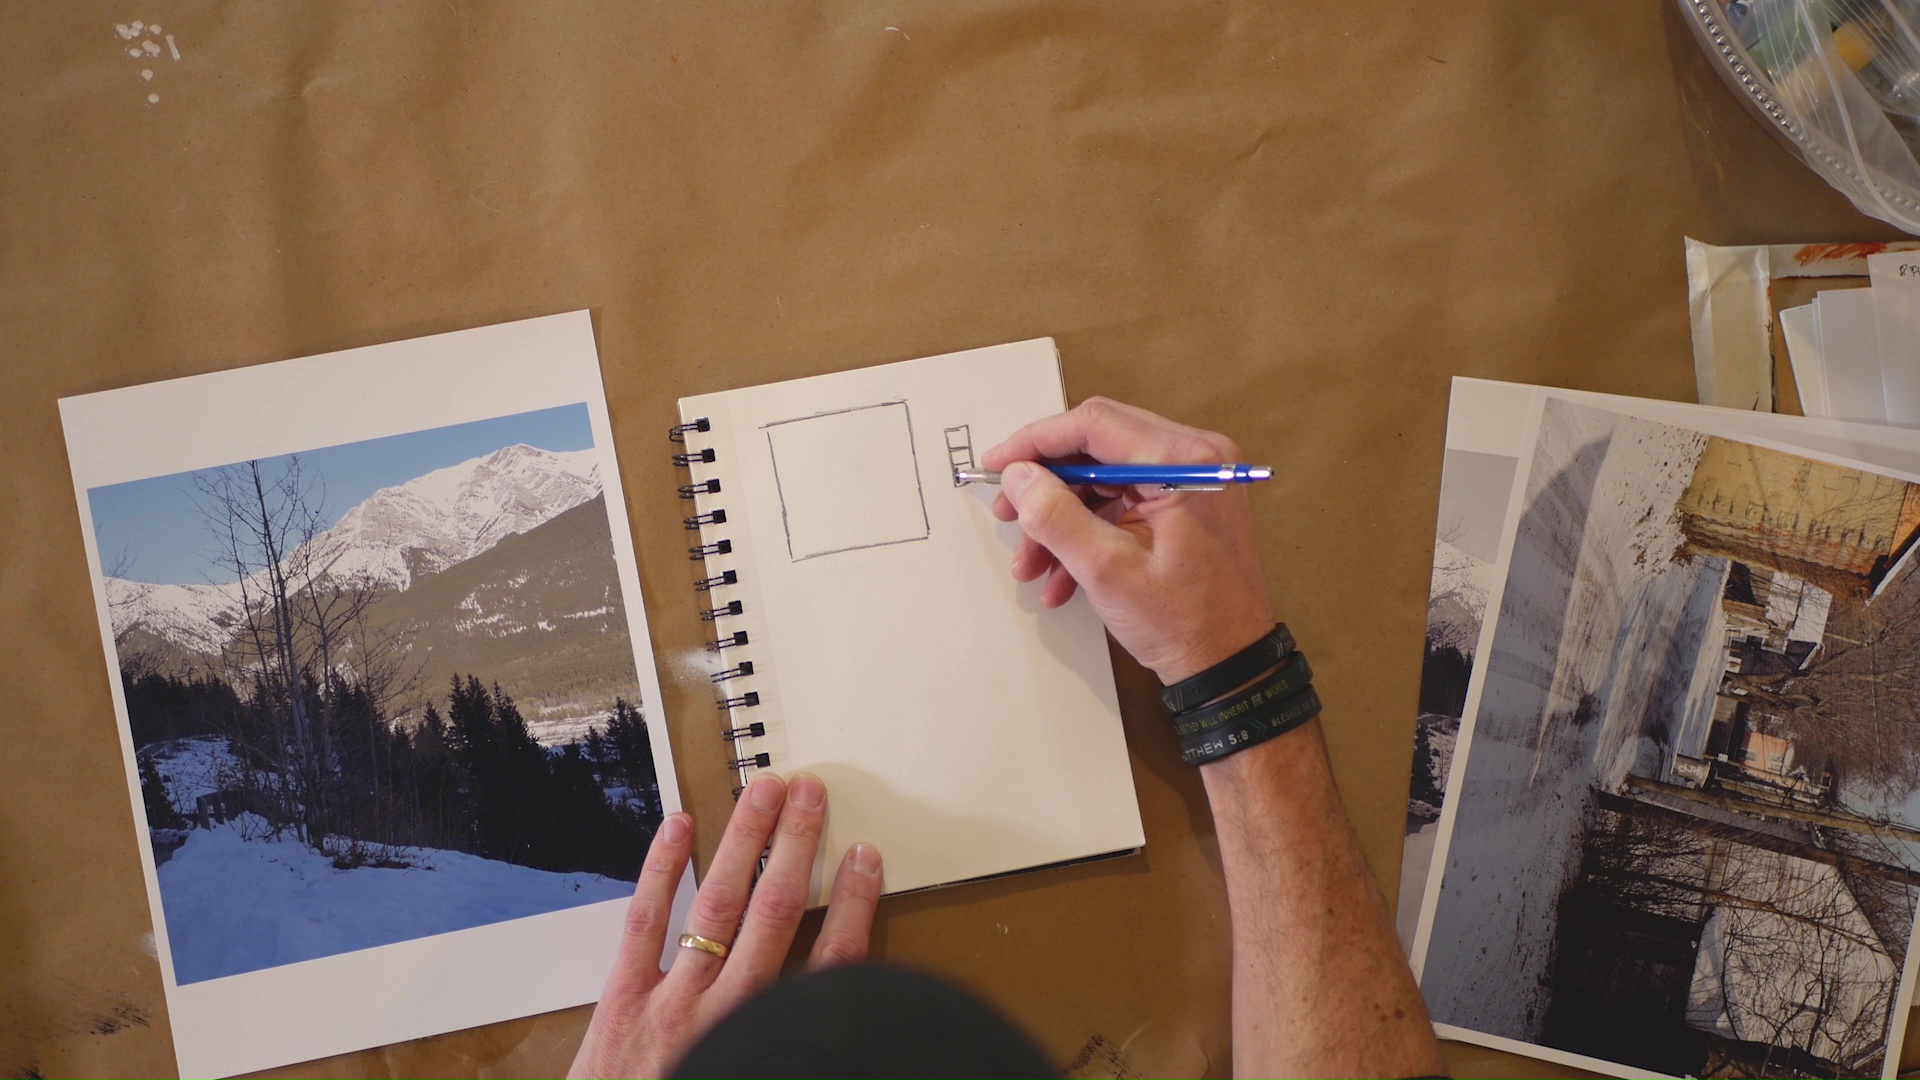
Notice how the reference photo and the box are same aspect ratio? That's super important. When doing a thumbnail sketch, I only use three values. So, I also make a small rectangle to reference values like so:
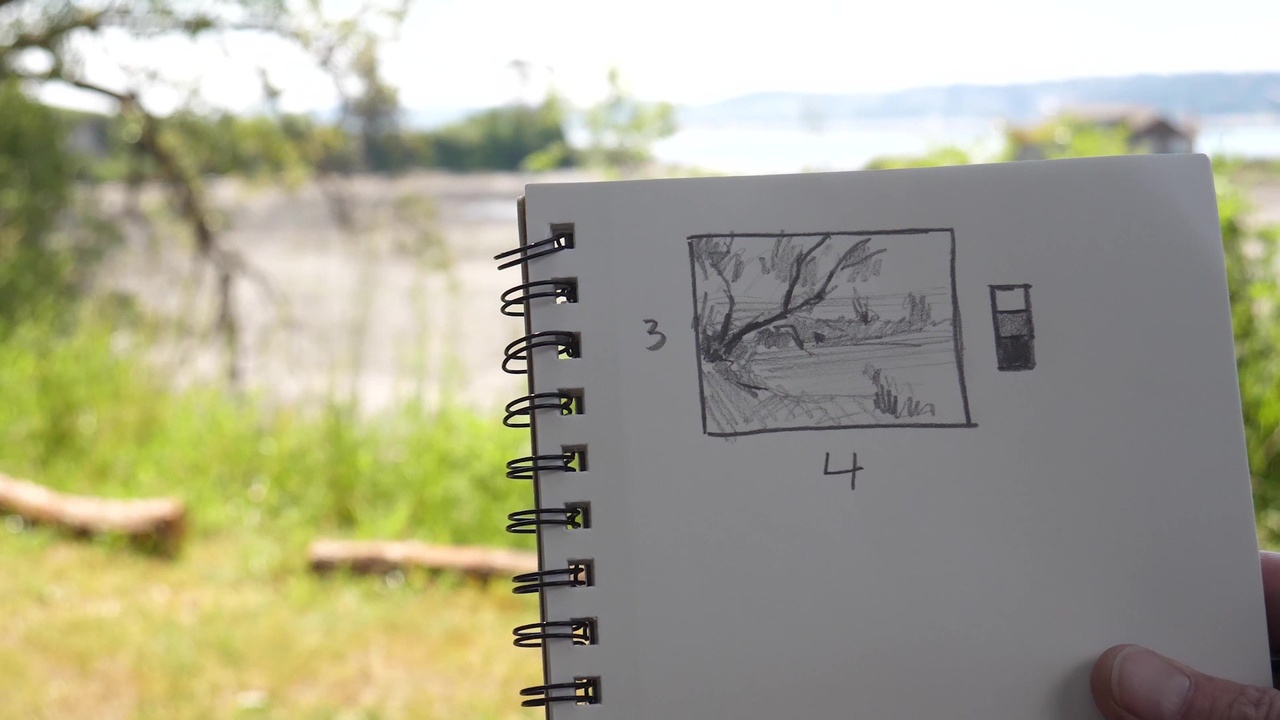
Step 2: Draw! It's really that easy. Sketch your reference photo loosely. Try to capture only the main value blocks of the photo. Don't worry about tiny details at all. Here's what I came up with!
Step 3: Make a new box and repeat steps 1 and 2 until you find a design that you're happy with! Run wild, make the painting your own! Here are some examples of different iterations of thumbnail sketches I've done in the past.

In THIS blog post, I did a breakdown of a mountain scene I tweaked to make a stronger painting overall. I ended up being super happy with the result!
Start incorporating thumbnail sketches into your workflow and I guarantee you'll enjoy the painting process more!
Stay connected with news and updates!
Join our mailing list to receive the latest news and updates from our team. You're information will not be shared.